YEP -- I'M A NEAT FREAK!

I am a self-diagnosed neat freak. I love to clean and I love to organize. (If I could have a container, holder and/or label for EVERYTHING, my life would be complete!) And this is my brand new blog for everything NEAT!
I have a toddler in perpetual motion, a packrat daughter, a dog and a disorganized husband... and I hope to share the challenges, trials, errors, rewards and insights of being a bit "too clean obsessive" in a family that's not so in love with neatness. And I am making a promise to clean, rearrange, organize and simplify my life... and help you along the way! SO stay tuned for my journey toward everything orderly and efficient!


Showing posts with label neat freak cheat sheet. Show all posts

Monday, November 3, 2014

Day 147: Dirty Fans

Dirty fans creep me out - a lot.  I just don't get it!  In our household, the ceiling fans are on almost all the time... so, how is it that they get SO filthy?  What about that quote: a rolling stone gathers no moss?  Shouldn't that concept transfer to the fan?  You know, a circulating blade gathers no dust?  But, alas.  Instead, our fans always look like THIS!  Ewwwwwww!

My husband is usually the one who gets so grossed out y this that he tackles the cleaning task - with paper towels and Pledge.  The blades always look shiny and new, but then there's chunks of dust bunnies all over the couch or bed or floor (or on all of the above).

SO... here's a new plan: pillow cases.  That's right!  PILLOW CASES!  Put this one in your neat freak cheat sheet!  If you use a pillow case to clean your fan blades, those nasty, dirty bits will end up IN the case, and you can simply toss them in the washing machine afterward.


Now, THAT's neat!

Friday, June 27, 2014

Day 145: Scarves + Tension Rods = Brilliant

Get your Neat Freak Cheat Sheet ready to go, because I spotted an incredible idea for scarves the other day from apartmenttherapy.com ...

Now, technically this a solution for people who live in apartments (or who have little storage space), but it can be easily adapted for a bathroom or closet, no matter where you live! 

I think the photos speak for themselves, but the idea is that you get several tension rods (which are usually inexpensive ... BONUS!) and hang them up in what may be a typically unused space, like behind a door or in a small nook in a closet or a bathroom.  Get out that colorful collection of scarves and hang them up by slipping them on the rods using an easy-to-remove knot. 

It looks amazing, it takes up very little room, it's all organized... AND it's so easy to get your scarf pick for your outfit that day!


Now, THAT's neat!

Wednesday, June 11, 2014

Day 144: The Mini Vac - My Salvation, My Sanity

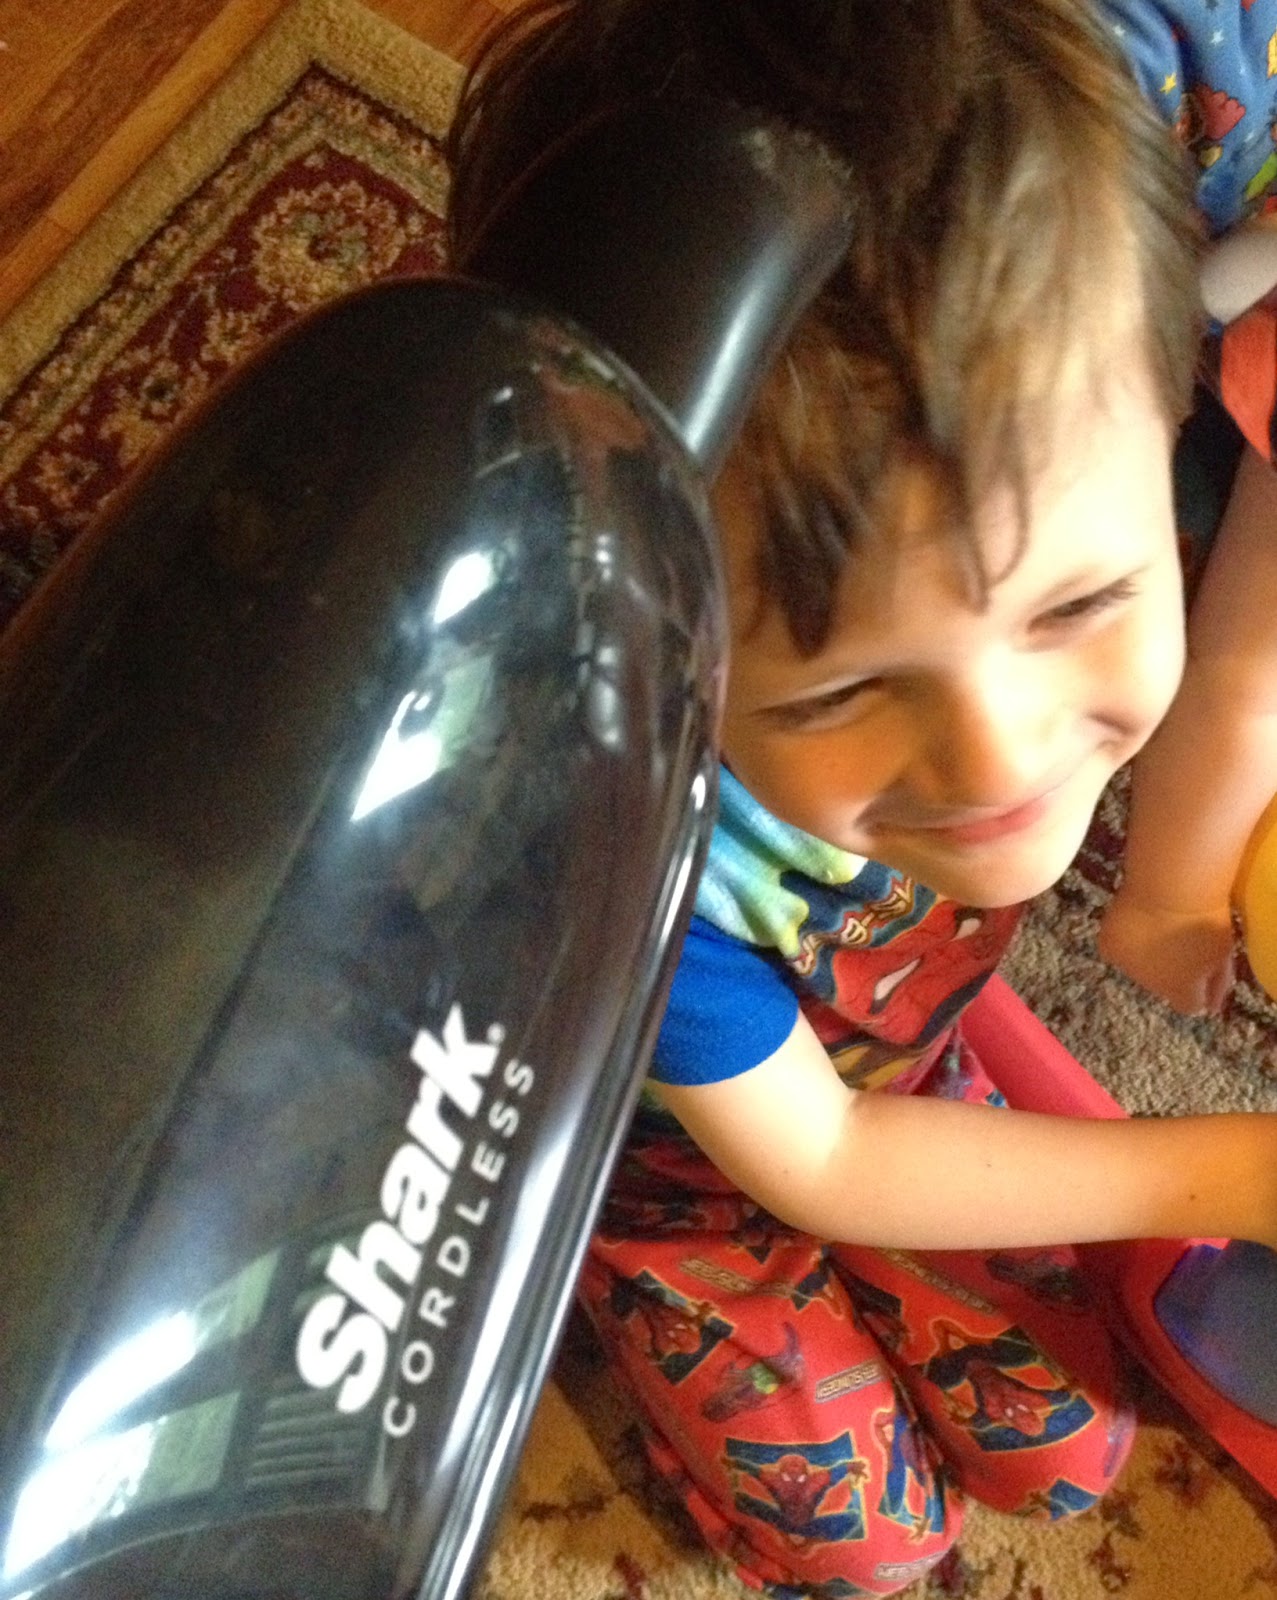
I got a purple Shark Pet Perfect II Hand Vacuum this past Christmas.  Don't judge!  I received a full-size vacuum cleaner for Christmas several years ago! :)  (Hey - it's NOT a bad gift for a neat freak.)  It's such a handy "neat freak cheat sheet" item that every household should have, especially if you have pets... or kids!

I've decided that this little wonder is one thing that helps me keep my cool each and every day with three children... and a dog... and a husband with a dirty job!  I no longer have to break out the "big guns" when cereal gets all over the floor or when dirt clumps create a "welcome" mat on the hardwood floor, right in front of the door to the garage.  Better yet - even my 4-year old can use this lightweight mini vac!  The kids actually ENJOY cleaning with this machine!

The mini vac has truly been a lifesaver, even this morning when I had to vacuum eggs out of my son's hair.  Yes.  Eggs.  And, yes... I vacuumed them out!  I had just sucked up the mess he left on the couch, so I turned toward him and spotted the food he was wearing/storing... or whatever was going on there.  He thought it was pretty funny.  And... it worked!  Way to save the day - and my sanity - again, mini vac! 


Now, THAT's neat!

Saturday, July 13, 2013

Day 141: Instant Bib Holder

Oh, kids... and their neat freak moms. ;)  I would have LOVED to have thought of this little "neat freak cheat sheet" tip a few years ago!  Instead of running to the laundry room for a bib (or for ANOTHER bib or 3 for those spaghetti nights), a stick-on hook on the back of the highchair does the trick perfectly.  Anyone else having one of those why-didn't-I-think-of-that moments?  Well, it's a-ok.  Just stick and hang away, and make meal time a little less chaotic!


Now, THAT's neat!

Tuesday, October 2, 2012

Day 131: Oh yes... I did


I am somewhat of a sucker when it comes to fun, new cleaning/organizing products.... and as I was tootling around the other day on an online shopping website, I stumbled across something neat: the "Slipper Genie." 
These soft, colorful, fuzzy slippers are a neat freak's dream come true!  Whenever my feet are cold, or whenever the floor has that not-been-mopped-lately look, I can slip these on (with a pair of socks if it's REALLY cold) and zip across the hardwood floors (or tile) in my home (and get a little exercise, too)!  As you can see, the bottoms of these clever foot covers are fluffy cleaning "fingers" that can grab dog fur and swipe up dirt and dust bunnies... while I am busy cleaning or organizing other things.  Talk about multi-tasking! 

My daughter thinks these slippers are pretty fun, so I might have to buy her a pair, too.  (YES - dual cleaning action... or is that quadruple, since there are four feet involved?!?!!)  AND... since my little boy likes to copy just about everything his big sister does, I may end up with 3 of us, slip-sliding our way around the house.... all while banishing crumbs, hair and particles!  YES - there are kid versions... adn they are super cute! (Oh, and the good thing is, the bottoms of these "mop flops" can velcro off, so you can toss them in the wash when you've been too busy cleaning floors!)


Now, THAT's neat!


Friday, September 14, 2012

Day 130: Bread ties - who knew??!


Plastic things.  You know, the ones you find on bread bags?  Some people call them "bread ties;" most people call them annoying!  Every time you take one off to get a slice of bread, it disappears, and you end up just twisting the end of the bread bag and tucking it in on itself instead!  I'm sure we have all misplaced many of these plastic bread ties or have just thrown them in the trash without a second thought.  Until now....

Anyone else ever get mad at the tape roll (and at whoever used it last without folding a piece down)?  Sometimes you turn that sticky roll over and over and over again for who knows how long, not able to locate that darn end.  And when you finally do find the end, you can't get the tape to unstick from itself, or the tape rips off into little shreds, and you end up wasting about 2 feet in the struggle!

Well... think back to the aforementioned bread ties.  Yep; those little plastic annoyances can become useful tools... in a whole new way!  Ready for this little tip from the neat freak cheat sheet? Just stick one of these bread ties (or two, if the tape is wide) on the end of the tape roll, and you have an automatic saver... and an instant starter for next time!

BRILLIANT!


Now, THAT's neat!

Friday, June 15, 2012

Day 126: Clever Scent Spot

Do you want your bathroom to smell lovely, without burning out all of your candles or using up air fresheners?  (Don't get me wrong, I LOVE using lovely-scented everythings in our WCs, but sometimes I am not there to refresh, plug in, spray or light!)  Well, here is a clever, little tip, straight from the "Neat Freak Cheat Sheet."  Just put those scented oils to use!


Every time you load up a new roll of toilet paper (and you know it will be you, since apparently no one else in the house knows how to reload those oh-so-complicated TP tubes!), add a drop or two of your favorite scents.  Every time someone spins the roll, the scent will be released!  Simple, right! ;)

Now, THAT's neat!

Saturday, March 31, 2012

Day 119: Waxing poetic? (Or, how to get wax out of clothes)


Scented candles smell so nice,
but wax on clothes is ick.
To get it out, don't use ice;
a warm iron will do the trick!


So... my antsy, very tired toddler knocked over an entire Scentsy wax burner the other day. I was completely freaked out - FIRST, that he may have burned himself (...which he did not; the wax, thankfully, was not hot enough) and SECOND, that there was a pile of wax and bits ALL over the table, the hardwood floor... and my son's clothes. He looked like a melted candle. Of course, the blue wax was all over a brand new outfit. And, of course, company was coming over in just a few minutes. I was able to scrape the wax off the table and the floor with a little, plastic tool once the wax cooled. Then I cleaned off those surfaces, as usual. But what about those clothes?!?! I'd never had to deal with THAT mess before!

I looked online and found a few interesting solutions to wax removal (Note to self: be sure to clarify CANDLE wax in the search box!) but finally settled on a warm iron and paper bags. I tried to scrape some of the wax off first with a butter knife, but I didn't have too much luck. SO... I used some lunch bags that I tore open, and, believe it or not, after just setting the paper bag pieces directly on top of the wax and gently ironing it (yes - straight onto the bag) with a warm iron, the wax melted onto the paper... and the clothes were, relatively, clean!


You can see all the greasy looking splotches on the paper bags (it took about 4 bags total), but the wax came out, and I just washed his outfit as I normally would! SUPER easy! And I didn't set any paper bags on fire! ;)


Now, THAT's neat!

Monday, May 30, 2011

Day 102: The Neat Trick to Cheaper Stuff, Online


OK, ok... so this isn't a tip about cleaning up your bathroom or organizing your underwear drawer, but it IS worthy of sharing. And, personally, I think it's worthy of being listed under my bag o' tricks in the "neat freak cheat sheet" file!

If any of you fellow neat freaks (or neat freak wannabe's!) love to shop online, then you MUST check out this little website: retailmenot.com. Whatever site you are on, be sure to visit retailmenot.com BEFORE making your purchase, because this little gem provides coupon codes and discounts, for perhaps 10% off... or $10 off! Of course, some retailers have opted NOT to be included on this site, but many are there... so TRY it! It's worth checking out so you can keep a little extra in your pocket... for the next online shopping trip! They also have coupons that you can print... so stop here before heading out to pick up groceries or try on some new shoes! (Hey, I buy everything from diapers to New York strip steaks online, so this is a GREAT tip!) ;)


Now, THAT's neat!

Friday, March 25, 2011

Day 93: Spooning in the Dishwasher?

My neighbor shared a little tip with me. Now, I have heard this one before, but I always thought it would keep the utensils from getting clean... you know, with all that spooning going on and all! But... it seems I may be wrong!

SO, here is another neat freak cheat sheet tip! (Wow! Two in a row!)


When loading the dishwasher, put all the same utensils in the same slot in your utensil bin. So, put all forks together, all spoons together, and so on. That way, when it's time to unload, the sorting is already done! This will save time and energy as you put those dishes away. My neighbor commented, "When unloading, it takes less than 1/2 the time... because [the utensils] are already sorted. For me, it's easier to sort on the front end!"


Now, THAT's neat!

Thursday, March 24, 2011

DAY 92: HA! Foil-ed again!

I love to bake, so I use my oven a lot... and I really, really hate cleaning it. Talk about the worst grimy, greasy, gooey, crunchy, baked-on mess. ACK!

So, I use a little help: aluminum foil.

Yes, I cook and bake with it... sometimes coating the inside of whatever bake ware I'm using so I don't have to wash and scrub so desperately when it's done. BUT, I also line the bottom of my oven with a sheet of heavy-duty aluminium foil.

This way, the grimy, greasy, gooey, crunchy bits and splats don't actually hit the oven floor. Instead, they get caught on the foil. And when the foil gets gross, I simply pull it out and toss it! EASY clean! And another great tip from the neat freak cheat sheet! ;)

Now, THAT's neat!

Thursday, March 3, 2011

Day 89: Quick Tip for Wayward Pouches

I have a bunch of food pouches in my pantry... you know, those mixes for tacos and chili and seasoned fries. Well, those said pouches tend to fall through the cracks, literally. And I was pretty tired of mounting an all-out search for these seasonings and such while in the middle of cooking.

So... simple solution: I took one of those "throw-away" plastic containers and stuffed all the pouches inside. Now, I can find what I need without straining my back while leaning over, balanced on one foot, digging around the bottom of the pantry where extra paper towels and other odds n' ends reside! :)

Add THAT to your neat freak bag o' tricks!


Now, THAT's neat!

Wednesday, February 23, 2011

Day 88: Microwave Quick Clean


Ok, I know we've talked about tackling the dreaded microwave gunk before (see THIS post), but this morning, as I was boiling some eggs, I did a quick clean on my microwave. WHY? Well, first of all, I wipe it down after every use. And second of all, if your microwave happens to be over the stove, like mine, the steam from whatever is cooking will go straight up. So, why not use this to your benefit? Oh yes, it's another little Neat Freak Cheat Sheet tip: use the steam from cooking to help clean your microwave, counter tops, or whatever. Just open the microwave door, and let the steam do its work. Then, take a paper towel and/or Lysol wipe (depending on the amount of dirt!), and wipe it down. Ta-da! A quick clean... and some multitasking! LOVE it!

Now, THAT's neat!

Monday, January 17, 2011

Day 79: The Pyrex Complex

Ok... back to those kitchen cabinets that we started talking about the other day...

As a neat freak, y'all know that I love to keep "like" things or families of items together. It just makes sense to me. And it makes it SO much easier to store, locate and use said items.

Well, the same can work in the kitchen, and that's why I keep all my glass cooking stuffs (AKA Pyrex) in the same cabinet!

It doesn't look all that impressive. And, frankly, it can get rather heavy to wriggle out what I need. But, until I can figure out how to add more shelves or create some other clever storage rack, this is how it is! ;)


You can see that bowls (on the bottom) are stacked in bigger bowls. And squares/rectangles are stacked in bigger squares/rectangles (on the middle shelf). I left the top shelf for a few of the "serving pieces" (AKA glass bakeware with pretty patterns on them!) since I don't fish them out quite as often as the other pieces. As well, my beloved Pampered Chef batter bowl has a spot of its own up there... which is easy for me, since I'm 6-feet tall! (If you are not quite as, uh.... blessed with high altitude, you might want to try stacking/storing your most-used items at a lower, more convenient, level!)

Neat Freak Cheat Sheet: I lined each shelf with some rubbery, non-skid stuff so the glass has a cushier landing!


Now, THAT's neat!

Monday, January 10, 2011

Day 78: Toothpaste... great for Tartar AND for Tarnish!

We had my sister-in-law and her fiance over for dinner the other night, and I was excited to actually have an opportunity to use my silver gravy boat. I've had that thing for, hmmm.... about forever, but I think I only used it one time, about 10 years ago. So, it's been neatly stored in my hutch ever since. I guess that explains why it was so tarnished. Ooops.


I REALLY wanted to use the gravy boat, but NOT in that condition. So... I remembered a little hint I learned a long while back to get rid of tarnish: toothpaste. Of course, I didn't have any regular, old, "plain" toothpaste. THIS is what I had!


I figured I'd give it a shot. So, I squirted a little toothpaste on the gravy boat and the tray and gently rubbed it in with a very soft paper towel.


Then I rinsed both pieces off in warm water. If I had spent a little more time (maybe with a toothbrush!), I could have removed all the tarnish in the smaller groves of the design. BUT, this was a great solution for the moment! A spiffy clean -- and MINTY fresh -- gravy boat!


Now, THAT's neat!

Saturday, December 4, 2010

Day 71: The Organized Party

I don't have all the answers when it comes to planning, organizing, hosting and cleaning up after parties... but I do have a few tricks up my sleeve!

AND... since I just hosted the 6th annual Christmas cookie swap at my home last night, I figured I'd share just a couple of my most popular - and hopefully useful - party tips!

I may make a few lists when I'm preparing for a party, but I am not an ultra-organized party planner. When it comes to throwing a fun get-together in my home, I plan out foods, beverages, favors, games, etc., etc., but I don't have any whiz-bang theories about it! :)

However, I do like to prep in stages. For instance, if you're planning a party for Sunday afternoon, and it's Friday night, go ahead and get some things done! Clean the party area(s). Bake or prep some of the food items (i.e. cheesecakes taste better a few days after baking, so I always bake those in advance of any gathering!). And start "staging" your party area(s). Move furniture to accommodate additional chairs or tables. Get table decor ready. And as soon as you can, plan out your food areas!

I like to organize and decorate my food table the day before (or at the very least, hours before) the party. In the photo, you can see that I have plates, napkins, serving plates, bowls and utensils in their places, ready to go! All that's missing is the food! (NOTE: If you'd like, use post-it notes to remind yourself what goes where.) This is SUCH a great time saver and a relief to get out of the way!


Of course, you can also see that I've placed a few different bags of chips in some tins. This way, they are ready to go! And if I have a helper, he/she will know what goes where! (Neat freak cheat sheet: I use tins or baskets lined with napkins for chips. This way, they are uniformly and neatly displayed; the chips look good and are easy to get to; and they clean up super fast! Just throw away the napkins... and rinse and dry the tins, if needed!)

AND... if you noticed, I have my plastic forks in another small tin on the table. This is an easy and fun way to incorporate utensils in your "partyscape!" You can also use glasses or vases... and if the utensils are a bit top heavy, try using marbles, beans or rice in the bottom of the container for some stability (and possibly a splash of color!).


Now, THAT's neat!

Friday, October 29, 2010

Day 65: A "Case" Study

I am not a fan of folding sheets... especially the dreaded fitted sheet. Why in the world does that darn thing have to be so difficult to fold!?!? I mean, it comes folded, in a nice, neat package. But that's the FIRST and the LAST time I ever see a fitted sheet look so neat! And, believe me, I have tried just about every fitted-sheet-folding method and tutorial out there. Nothing is fool proof. However, I have learned a few things along the way.... So, feel free to follow along for a few tips... and perhaps a little surprise! (**Neat freak cheat sheet ALERT!**)

1. Put your clean sheets on your bed. (No sense spreading them all over the floor and getting them dirty again, right?!?!)

2. After folding the flat sheet (no tutorial here, folks.... just grab corners, fold, fold, fold, fold.... and you're done!), spread out your fitted sheet and pull the fitted corners tight.

3. Bring the corners together on both ends by folding the sheet in half. Keep those corners tight, and match them up as best as you can!


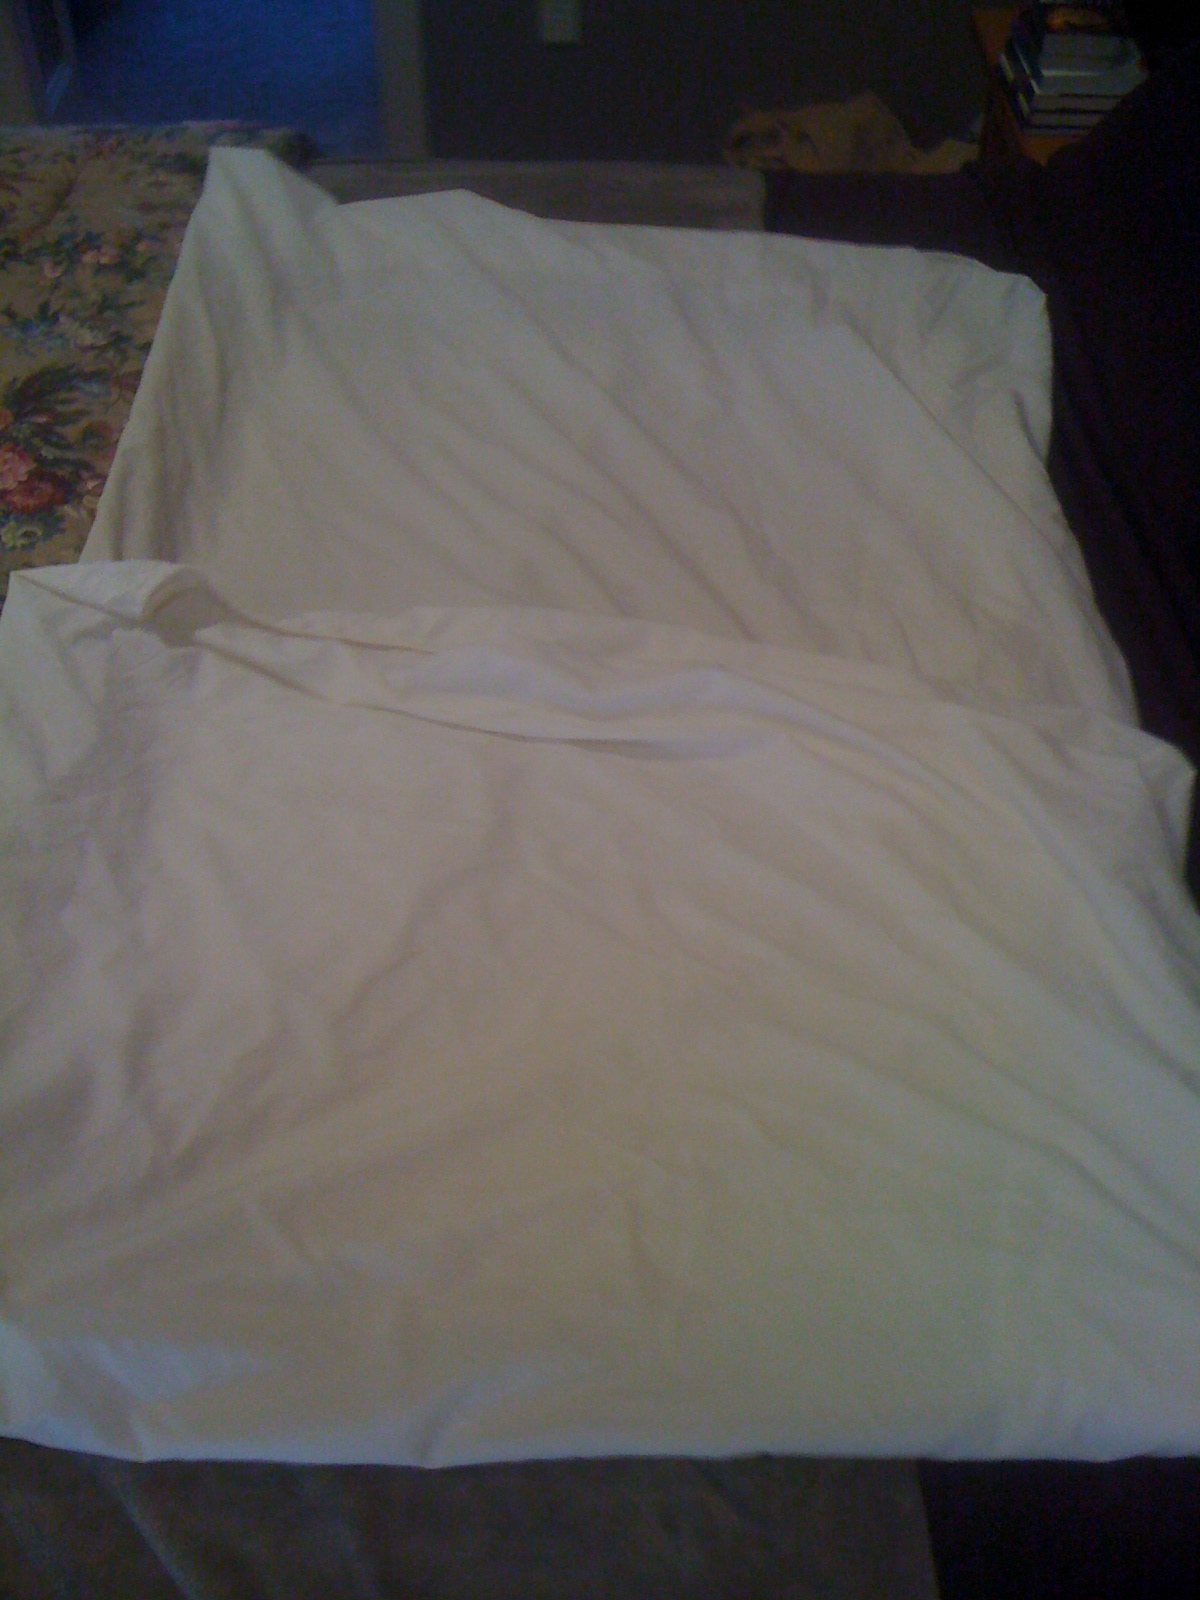
4. Now, fold the sheet in thirds.


It should look somewhat like this:


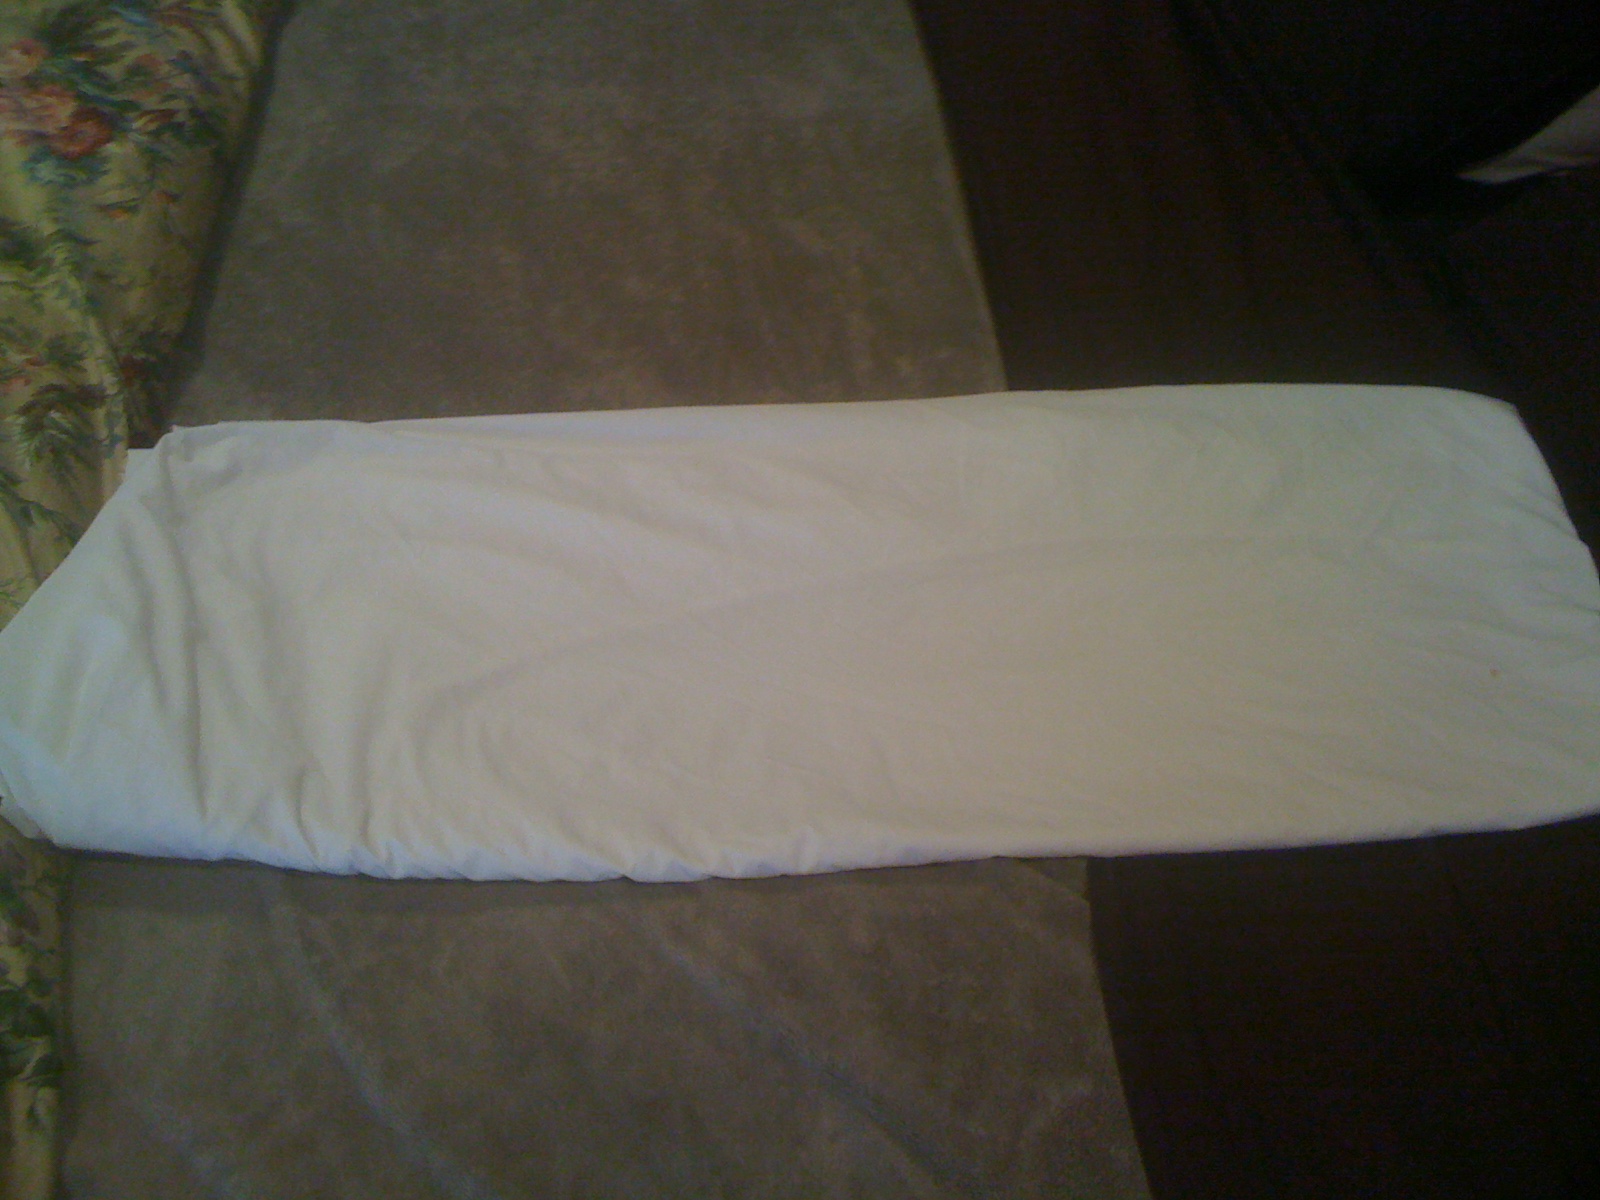
5. Fold in half, longways.


6. And fold in thirds again!


7. That's about all for that darn fitted sheet. Oh, but we aren't quite through.... here's a little neat freak cheat sheet tip: Stack your fitted sheet, flat sheet and ONE pillow case in a nice, neat pile.


8. Slip the entire pile into the SECOND pillow case.


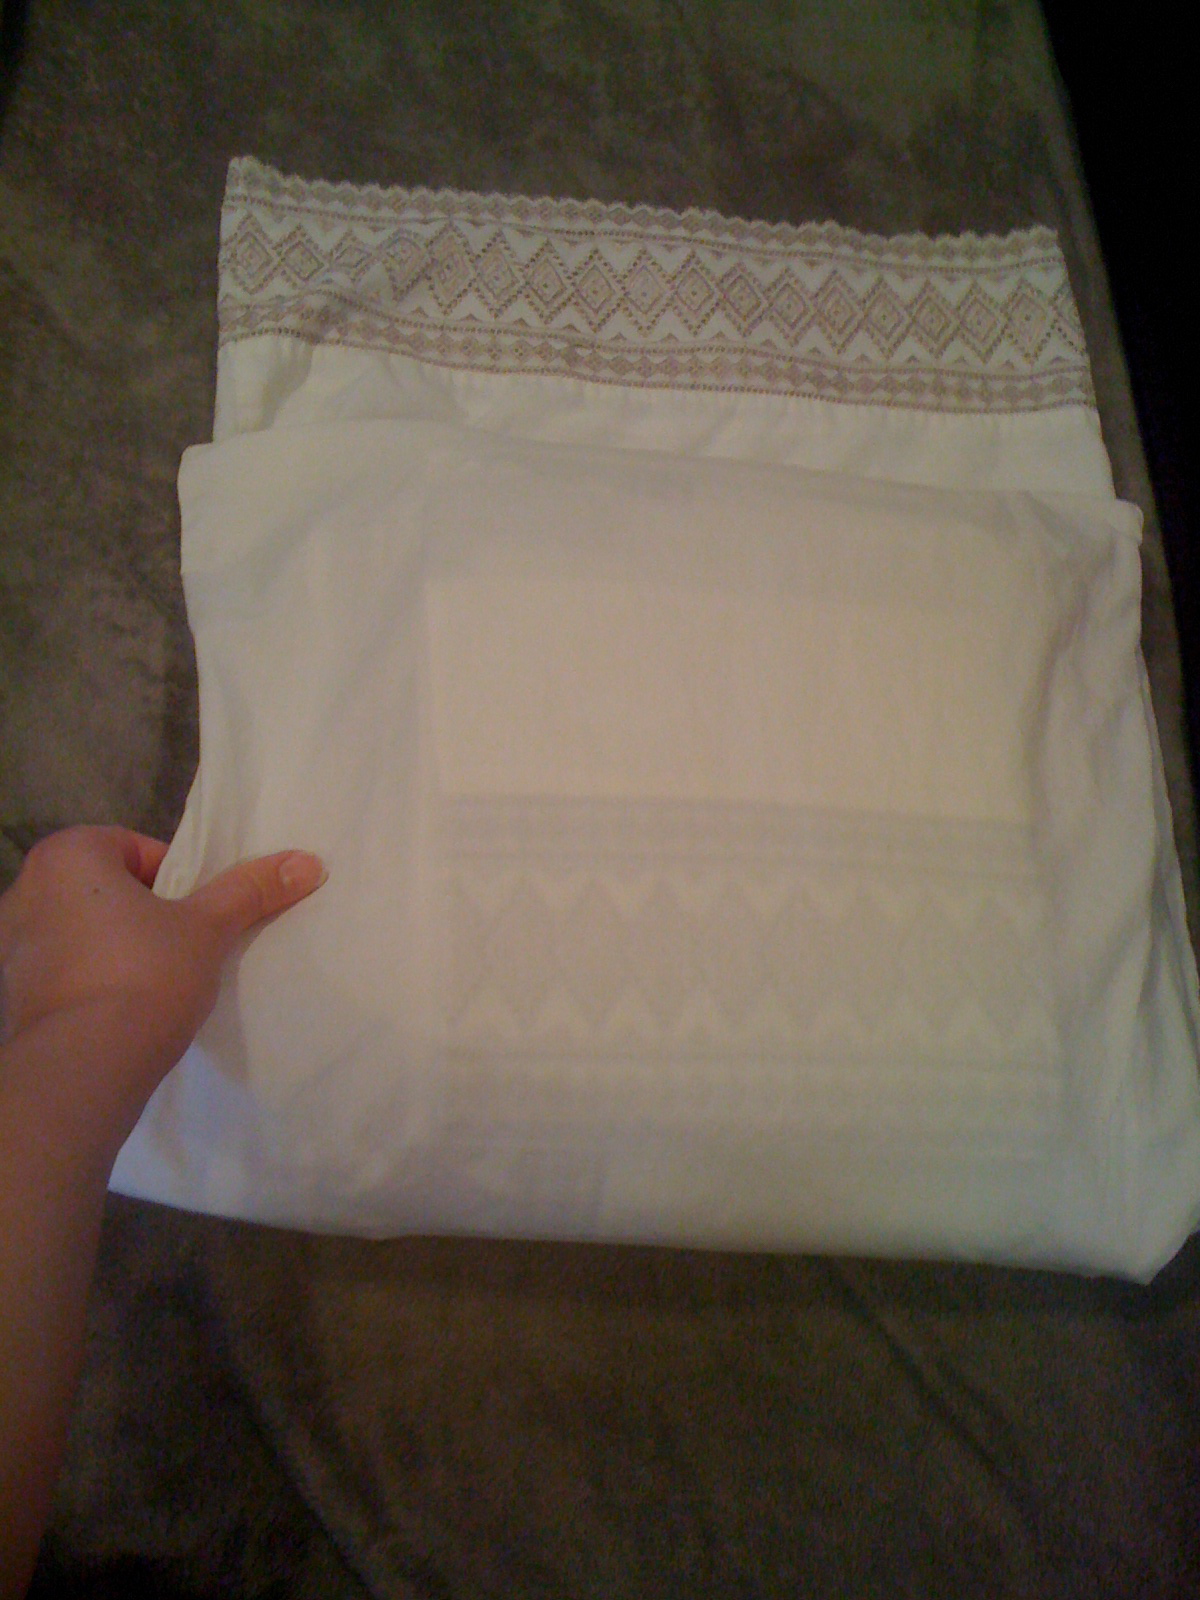
9. Fold the pillow case tightly and neatly around the sheet pile.

10. Fold again until you get a VERY neat sheet package!


And... now you're ready to put your clean, folded sheets (hidden snuggly inside your pillow case) on a shelf or in a drawer!


Now, THAT's neat!

Wednesday, October 13, 2010

Day 62: Potholders ...Useful in More than Just the Kitchen

I recently had to go on a little business trip, and as I was packing, I was reminded that one of the last items I usually end up adding to my suitcase -- before smooshing it closed and zipping it up -- is either my hair dryer or my curling iron... or both! Of course, this usually means that those two things were in use immediately before flying out the door to get from point "A" to point "B," so these items are always HOT... which makes it a bit awkward for packing! This typically results in the frantic blowing off and waving around of said electronic heating gadget... or a quick trip to the refrigerator... or, worse yet, the hanging-out-the-window-on-the-way-to-the-airport method so it's cool enough to stuff in your bag at the last minute!

Enter the potholder.


Yes, the potholder... in just about any size, shape or color. (*Neat freak cheat sheet alert!) This handy, heat-handling, anti-hand-burning kitchen tool is quite useful for packing hot items in your suitcase. Like curling irons, flat irons... or a just-used hairdryer!

Simply slip the not-quite-cool-yet electronic gadget into the potholder, and then you can pack it safely and snuggly without worrying that your suitcase might burst into flames at any moment! ;)

Now, THAT's neat!

Wednesday, September 15, 2010

Day 59: Do You Clean Your Washing Machine?

Maybe it's just me, and/or maybe I am a little paranoid, but when I peered into our washing machine today after a quick load of laundry, I thought to myself, "Ewwww.... do clothes really get clean in THAT?!?!"

Here's what I saw:


Now, I typically run the washing machine empty every so often with the hottest water and the largest load size with a little bleach and/or lemon juice so it has a chance to get clean and fresh. But I am not so sure that my little ritual would have gotten rid of this gunk. So, I got out the SonicScrubber to put it to the test -- yet again!


After messing around with which head to use and which worked best on the task at hand, I ended up with a MUCH cleaner place for CLEANING clothes:


Now, if you'll excuse me, I have a little bleach and some lemon juice waiting for their turn in the washing machine.... :)

By the way, if you have stubborn stains on the inside of your machine, there are cleaning products (designed for washing machines) that are available at most hardware and home improvement stores. Oh... and here's a little neat freak cheat sheet tip: to keep from having to clean your washing machine too frequently, leave the door to the machine open, if possible, after washing a load of laundry. This will allow the machine to dry out in between loads and prevent mildew!


Now, THAT's neat!